


Web3 and Blockchain is a hot topic in town, how about creating a micro Twitter site on blockchain where users can come and post a small message which will be visible to all the visitors on the site.
Stop talking show me the code!!
The Tech stack we will be using to build this project will
- Solidity -: For building a smart contract that will store messages on blockchain
- ReactJS -: For building are frontend which will also be interacting with our smart contract
- TailwindCSS-: Tailwind is my goto CSS library, I will be using tailwind to make my microsite more beautiful
- Hardhat-: We will be using hardhat for the development environment to compile, deploy, test, and debug your Ethereum software. You can find more about it here
Let's create our solidity contract
We are using solidity to write our smart contract which will also be reading and writing messages on the blockchain.
mkdir micro_twitter
cd micro_twitter
npm init -y
npm install --save-dev hardhat
Cool, now we should have Hardhat. Let's get a sample project going.
Run:
npx hardhat
This will create a sample project with hello_world contract, let's update that contract with our micro Twitter code and name our contract as MicroTwitter.sol. I have commented on most of the code, but feel free to reach out to me to understand any part of it
// SPDX-License-Identifier: UNLICENSED
pragma solidity ^0.8.4;
import "hardhat/console.sol";
contract MicroTwitter {
    uint256 totalTweet;
    uint256 private seed;
    constructor() payable{
        console.log("Hi from contract console");
        seed = (block.timestamp + block.difficulty) % 100;

    }
    // Unlike any other evnts
    event NewTweet(address indexed from, uint256 timestamp,string message);
    // Struct wave
    struct Tweet{
        address twitters_address;
        string tweet;
        uint256 timestamp;
    }
    // Decalare variable tweets from new struct Tweet
    Tweet[] tweets;
       /*
     * This is an address => uint mapping, meaning I can associate an address with a number!
     * In this case, I'll be storing the address with the last time the user twitted at us.
     * just to avoid spam tweets as this is blockchain
     */
    mapping(address => uint256) public lastTweetAt;


    /*
    This tweet function stores the tweet into the variables tweet
    */
    function tweet(string memory _message) public{
         require(
            lastTweetAt[msg.sender] + 15 minutes < block.timestamp,
            "Wait 15m"
        );
        lastTweetAt[msg.sender] = block.timestamp;
        totalTweet+=1;
        console.log("%s has twitted!", msg.sender);
        tweets.push(Tweet(msg.sender,_message,block.timestamp));
        console.log("Random number! %d", seed);
         emit NewTweet(msg.sender, block.timestamp, _message);

    }
    // get all waves
    function getAllTweets() public view returns(Tweet[] memory){
        return tweets;
    }
    // kind of a get request
    function getTotalTweets() public view returns(uint256){
        console.log("We have %d total waves",totalTweet);
        return totalTweet;
    }

}
So we have created our backend code, now its time to wire up our frontend to our own smart contract and take a step further
Setup Frontend
Inside our project let's add our frontend project name micro_twitter_tailwind using the following command
npx create-react-app micro_twitter_tailwind
cd micro_twitter_tailwind
Once the project is created, we will add tailwind to our project to quickly scaffold our micro Twitter frontend using the following command
npm install -D tailwindcss postcss autoprefixer
npx tailwindcss init -p
Refer to this link to setup react tailwind project here
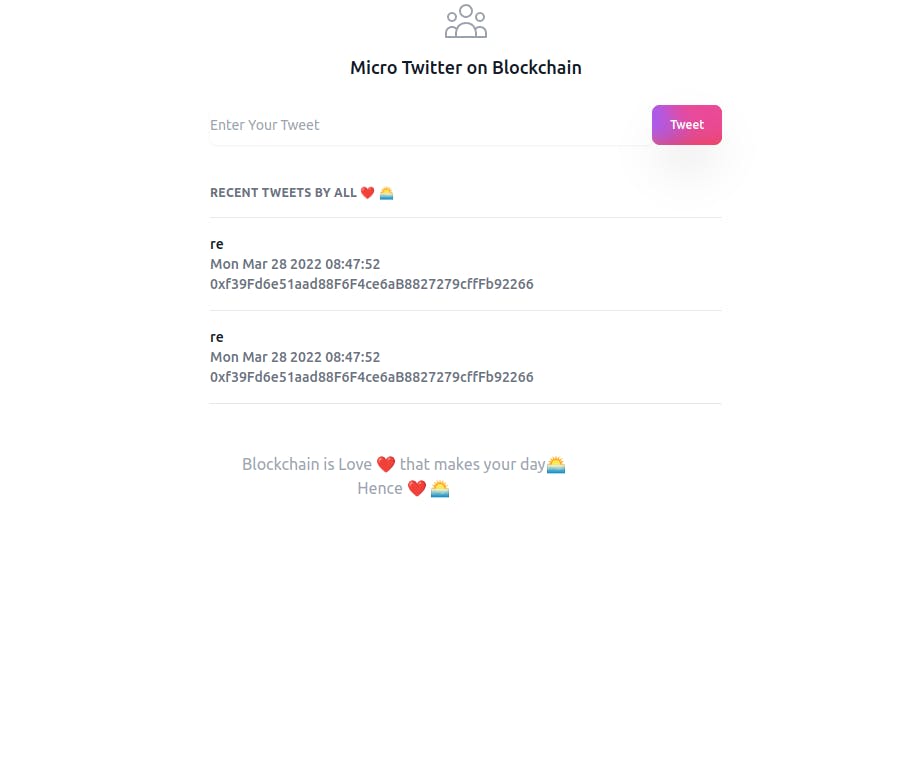
Using tailwind I have created a very basic design, like below
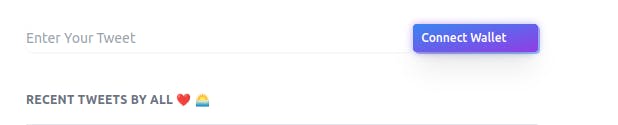
Connect Our Wallet
We have already created our smart contract, now its time to connect our wallet so that we can access our contract
Code to connect, the wallet. Here we are already assuming that metamask is installed which exposes the Ethereum object in the windows
  const connectWallet = async () => {
    try {
      const { ethereum } = window; //get the ethereum object from window
      if (!ethereum) {
        alert("get metamask")
        return;
      }
      const accounts = await ethereum.request({ method: "eth_requestAccounts" });
      console.log("Connected", accounts[0]); //get the current account
      setCurrentAccount(accounts[0]); //set the current account
    } catch (err) {
      console.log(err)
    }
  }
You can find the full code inside my Github.
Get the list of total tweets
Here we will be referencing our contract function which we have written in the solidity code
  // Get all tweets
  const  getAllTweets = async () => {
    const { ethereum } = window
    if (ethereum) {
      const provider = new ethers.providers.Web3Provider(ethereum);
      const signer = provider.getSigner()
      const tweetContract = new ethers.Contract(contractAddress, contractABI, signer);
      const tweets = await tweetContract.getAllTweets(); //our contract function
      let tweetsCleaned = [];
      tweets.forEach(twt => {
        tweetsCleaned.push({
          twitters_address: twt.twitters_address,
          timestamp: new Date(twt.timestamp * 1000),
          tweet: twt.tweet
        });
      });

      setAllTweets(tweetsCleaned);
    }
  }
Send tweet
Here we will be referencing our contract function which we have written in the solidity code
 const tweet = async () => {
    try {
      setIsMinting(true)
      const { ethereum } = window;
      if (ethereum) {
        const provider = new ethers.providers.Web3Provider(ethereum);
        const signer = provider.getSigner();
        // How to connect to the created contract
        const microTwitterContract = new ethers.Contract(contractAddress, contractABI, signer);

        // Get the count of total tweet
        let count = await microTwitterContract.getTotalTweets();
        console.log("Retrieved total wave count...", count.toNumber());
        // Send the transaction
        const twettxn = await microTwitterContract.tweet(message);

        console.log("Mining", twettxn.hash)
        // Wait for the transaction to complete
        await twettxn.wait();
        console.log("Minted--", twettxn.hash)
        setIsMinting(false)
        count = await microTwitterContract.getTotalTweets();
        console.log("Retrieved total wave count...", count.toNumber());
        getAllTweets()
      }
      else {
        console.log("Ethereum object doesn't exist!");
      }
    }
    catch (error) {
      console.log(error)
    }
  }
Once we are done with the wiring up frontend and smart contract, it's time to deploy our contract to test network AKA Rinkeby Test Network. You can refer to my other article to deploy the smart contract here
Hoorayyyyy Our Contract is deployed 🎉🎉

Using vercel I deployed my frontend here and made a very first tweet on the blockchain
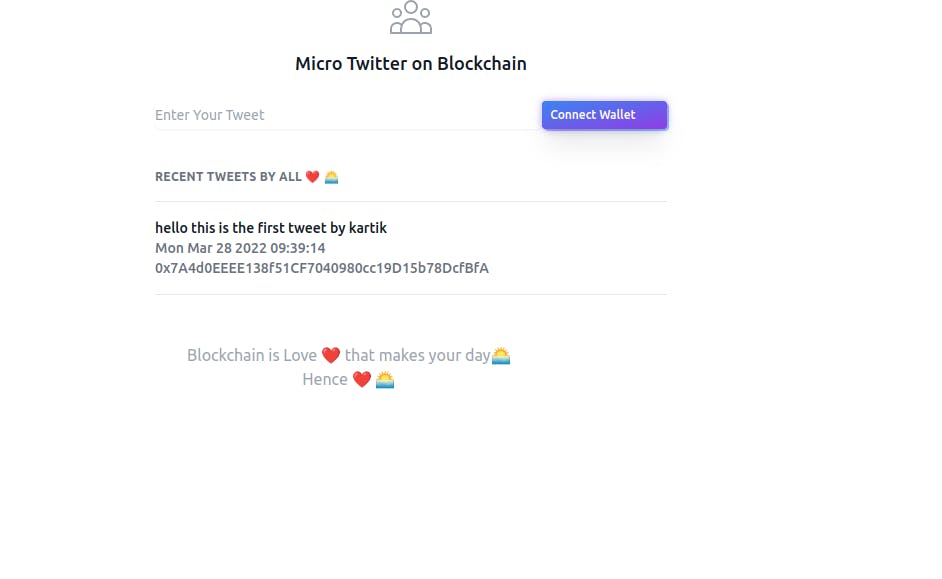
You can find the transactions details here rinkeby.etherscan.io/tx/0xbffa052865aedd83e..
Git repo of this project https://github.com/kartikpuri95/micro-twitter-tailwind
We have deployed our own micro twitter 🎉🎉
I hope you like this post, you can follow me on twitter for more such updates and do give a reaction
You can get in touch with me kartikpuri.com